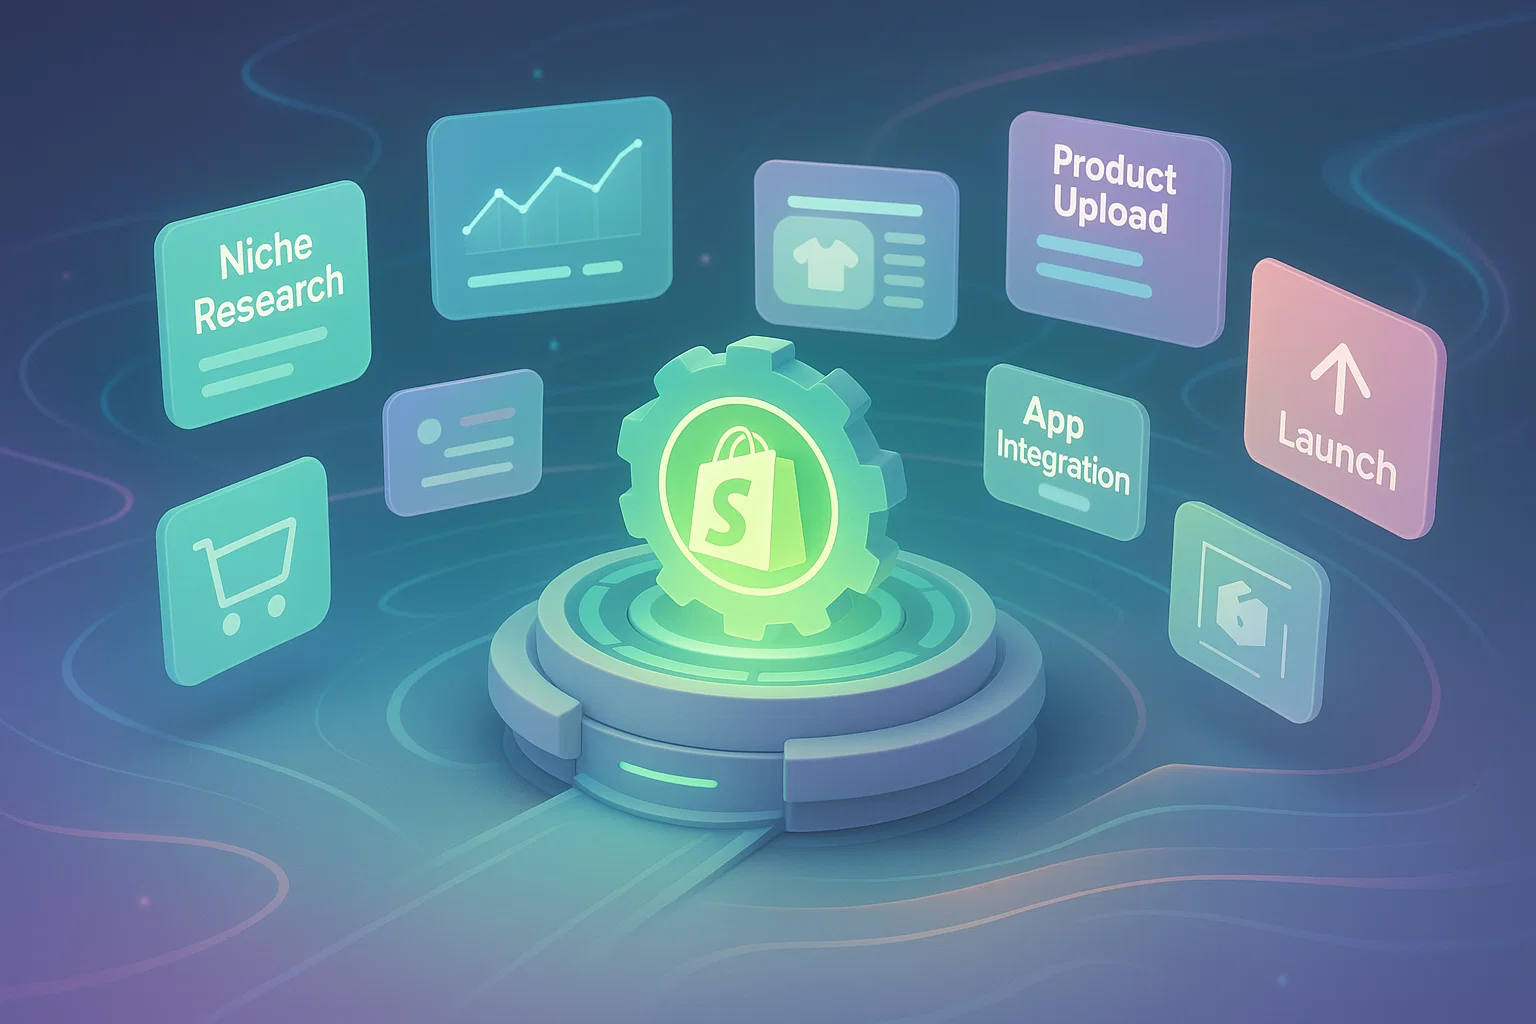
A Warm, Step-by-Step Guide to Building Your Ecommerce Dream
Hey there, dreamer! Picture this: you’re sipping coffee, scrolling through Instagram, and you see someone’s gorgeous online store selling handmade candles or trendy workout gear. Your heart skips a beat, and you think, “I want to do that!” If starting a Shopify store in 2025 is on your mind but you’re feeling a bit lost or nervous, you’re in the right place.
I’ll let you in on a little secret: a few years back, I was exactly where you are. I had big ideas but zero clue how to turn them into reality. My first Shopify store? It was a mess of trial and error—wrong product photos, clunky checkout, you name it. But I kept at it, learned the ropes, and now my store’s my happy place, connecting me with customers worldwide and paying my bills while I sleep. If I can do it, so can you.
Think of this guide as a chat with a friend who’s been there. I’m sharing every step to start a Shopify store in 2025, sprinkled with personal tips, SEO tricks, and a whole lot of heart to help you shine online. Plus, I’ve woven in Google AdSense-friendly strategies to boost your store’s traffic and revenue. Ready to make your ecommerce dream real? Let’s dive in!
Why Launch a Shopify Store in 2025? (Spoiler: It’s a Game-Changer)
Okay, let’s talk about why starting a Shopify store in 2025 is like catching a wave at just the right moment. Ecommerce is soaring—people are shopping online more than ever, and Shopify’s the platform powering over 1.75 million stores, from small side hustles to brands like Allbirds. Here’s why you should jump in:
- It’s Beginner-Friendly: No coding or design skills? No problem. Shopify’s drag-and-drop tools make it easy to create a pro-looking store in a day.
- Sell Anywhere, Anytime: Reach customers in London, Sydney, or a tiny town in Montana with Shopify’s global payment and shipping options.
- Endless Possibilities: Sell handmade jewelry, digital art, or even yoga classes—Shopify supports it all.
- Grows with You: Start small, then scale up with advanced features as your sales soar.
- Traffic Magnet: Shopify’s built-in SEO and marketing tools (plus Google AdSense potential) help you attract visitors and turn them into buyers.
I started my store as a side gig, selling quirky plant pots. It wasn’t perfect, but seeing that first sale notification? Pure magic. Your store can be your creative outlet, your business, or both. And with Shopify, you’re in control. Let’s make it happen!
Step 1: Sign Up for Shopify (Your First Leap Toward Ecommerce Stardom)
Kicking off your Shopify journey is as easy as signing up for a newsletter. Shopify offers a 3-day free trial plus 3 months for $1, so you can test everything without stress. Here’s how I did it, and you can too:
- Head to Shopify’s website and hit “Start free trial.”
- Pop in your email and a password you won’t forget.
- Answer a few questions—pick “I’m just starting” if you’re new, and choose whether you’re selling online, in-person, or both.
- Name your store. Go for something catchy and tied to your vibe, like “GreenLeafGoods” for eco-friendly stuff. If you’re stuck, I love using Namelix for ideas.
- Add your business location, hit “Enter my store,” and you’re in!

My Two Cents: When I named my store, I spent hours overthinking it. Don’t do that! Pick something you like, and you can always tweak it later. Also, check your inbox for Shopify’s email verification link—it’s easy to miss.
Once you’re in the Shopify dashboard, it’s like your store’s command center. Take a moment to poke around—it’s less scary than it looks.
Get Started with Shopify Now →
Step 2: Pick Your Products (Finding a Niche That Lights You Up)
Now comes the fun part: deciding what to sell on your Shopify store. This is where your passion meets profit. Shopify lets you sell almost anything—physical goods, digital downloads, or even services. Here’s what you could offer:
- Physical Products: Think candles, t-shirts, or pet accessories.
- Digital Products: eBooks, printable planners, or music tracks.
- Dropshipping: Sell without inventory—suppliers ship for you.
- Services: Offer coaching, graphic design, or workshop tickets.
- Subscriptions: Monthly coffee deliveries or exclusive content.
How I Chose My Niche: I started with plant pots because I’m obsessed with indoor greenery. But I also checked what people were searching for. Here’s how you can find your sweet spot:
- Chase What You Love: What gets you excited? Baking tools? Minimalist jewelry? Your passion keeps you going when things get tough.
- Spot Trends: Use Google Trends to see what’s hot. For example, “biodegradable phone cases” might be trending.
- Spy on Competitors: Browse Shopify stores or Amazon to see what’s selling. Find a gap—like vegan leather bags instead of generic ones.
- Think Profit: High-margin items like accessories or digital products are easier to scale.
Traffic Tip: Target specific keywords like “handmade ceramic mugs for coffee lovers” to attract buyers who are ready to shop. If you’re testing the waters, try dropshipping with Oberlo—it’s how I started without upfront costs.
My Mistake: I once tried selling something I wasn’t into just because it was “profitable.” Big flop. Sell what you’d buy yourself—it shows in your store’s vibe.
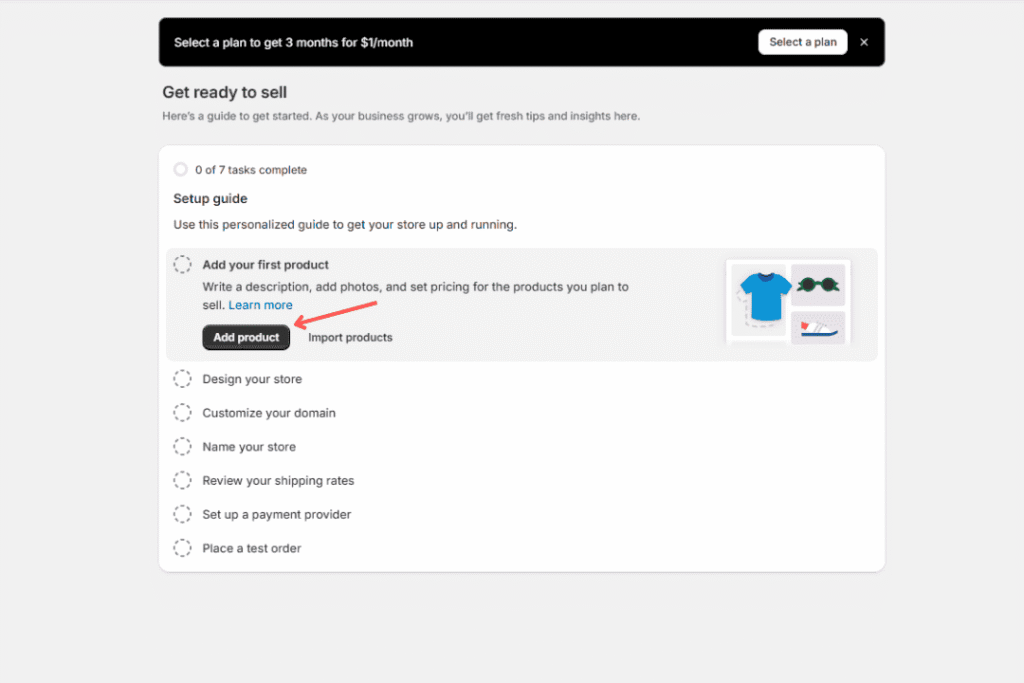
Step 3: Add Your First Product (Make It Irresistible)
Time to stock your virtual shelves! Adding products is where your store starts feeling real. Here’s how I added my first product, and you can follow along:
- In your Shopify dashboard, go to “Products” > “Add Product.”
- Title: Write a clear, keyword-rich name, like “Handmade Ceramic Mug with Floral Design.”
- Description: Tell a story—why’s this mug special? Maybe it’s “perfect for cozy mornings with your favorite latte.” Sprinkle in keywords naturally.
- Price: Research competitors on Etsy or Amazon to stay competitive. Add variants like colors or sizes.
- Photos: Use bright, clear images. I use Canva to polish mine. Add alt text like “handmade ceramic mug” for SEO.
- Inventory: Set stock levels or link to a dropshipping app.
- Hit “Save” to go live!
Real Talk: My first product photos were blurry disasters. Invest in good lighting or a decent phone camera—it makes a huge difference. Also, Shopify’s Learning Center has a free course on adding products that saved me from rookie mistakes.
AdSense Tip: Well-optimized product pages with keywords like “buy handmade ceramic mug online” can attract organic traffic, making your store more appealing for Google AdSense approval.
Create Stunning Product Images with Canva →
Step 4: Choose a Domain Name (Your Store’s Home Address)
Your domain name is like the sign above your shop door—it needs to be memorable and scream “you.” Shopify gives you a free subdomain (e.g., yourname.myshopify.com), but a custom domain like www.GreenLeafGoods.com looks pro and helps with SEO.
- In your Shopify dashboard, go to “Settings” > “Domains.”
- Buy a domain through Shopify (~$10/year) or connect one from Namecheap.
- Pick a short, brandable name with a hint of your niche (e.g., “VeganGlowShop.com” for skincare).
My Story: I agonized over my domain name, but in the end, simple and clear won. Avoid weird spellings or numbers—customers won’t remember “Gr33nLeafz123.com.”
AdSense Tip: A custom domain boosts credibility, which Google AdSense loves when reviewing your site for ads.
Grab Your Domain with Namecheap →
Step 5: Design Your Store (Make It Feel Like Home)
Your store’s design is your chance to wow customers the moment they land. Shopify’s editor is like decorating a cozy café—no tech skills needed. Here’s how I made my store pop:
- Go to “Online Store” > “Themes.”
- Pick a free theme like Dawn—it’s sleek and fast.
- Click “Customize” to tweak colors, fonts, and layouts. I went with earthy greens for my plant-themed store.
- Create a logo with Tailor Brands. It’s not free, but it’s cheaper than hiring a designer.
Design Hacks:
- Keep it clean—cluttered stores scare people away.
- Make it mobile-friendly (most shoppers use phones).
- Use fonts like Lora or Montserrat for a modern vibe.

My Oops Moment: I once used a theme that looked cool but loaded slowly. Traffic tanked. Stick with lightweight themes like Dawn for speed and SEO.
AdSense Tip: A fast, user-friendly design improves visitor engagement, which Google AdSense considers for ad approval.
Step 6: Add Must-Have Pages (Build Trust and Credibility)
Before you open your virtual doors, add a few pages to make your store feel legit. These are like the warm smile you give customers walking into a shop. Here’s what you need:
- About Us: Share your why. For my store, I wrote, “GreenLeafGoods started in my tiny apartment, fueled by a love for plants and sustainability.”
- Contact Us: Add a form with Shopify Forms.
- Privacy Policy & Terms: Use Shopify’s policy generator for free legal pages.
- FAQ: Answer stuff like “How long does shipping take?” to save time.
Go to “Online Store” > “Pages” > “Add Page” to create these, then add them to your menu under “Online Store” > “Navigation.”
Life Lesson: I skipped an About page at first, and customers emailed me asking, “Who are you?” Don’t make that mistake—people want to know the human behind the store.
AdSense Tip: Complete, keyword-rich pages (e.g., “sustainable plant pots” in your About page) boost SEO and show Google AdSense your site’s legit.
Step 7: Set Up Shipping and Payments (Keep Customers Happy)
A seamless checkout is what turns browsers into buyers. Shopify makes shipping and payments a breeze, but here’s how to nail it:
Shipping:
- Go to “Settings” > “Shipping and Delivery.”
- Set rates by region. For physical products, add accurate weights and sizes.
- Try free shipping on orders over $50—it’s a sales booster.
- For dropshipping, apps like Spocket handle shipping for you.
Payments:
- Go to “Settings” > “Payments.”
- Use Shopify Payments for simplicity or add PayPal, Stripe, or local methods.
- Enable Shop Pay for lightning-fast checkouts.
Taxes: In “Settings” > “Taxes,” set up tax collection based on your location. Shopify’s guides are a lifesaver here.
My Tip: I once forgot to set shipping rates for international orders—yikes! Double-check your settings to avoid surprises.
AdSense Tip: A smooth checkout reduces bounce rates, which Google AdSense monitors for ad eligibility.
Step 8: Test Your Store (Avoid Embarrassing Glitches)
Before you shout “We’re open!” from the rooftops, test your store like a customer would. This saved me from launching with a broken checkout button (true story).
- Visit your store (yourname.myshopify.com).
- Add a product, go to checkout, and place a test order using Shopify’s test order guide.
- Check shipping, taxes, and payment options work smoothly.
- Test on your phone—mobile shoppers are your biggest crowd.
Real Talk: My first test order showed my product images weren’t loading on mobile. Fixed it before launch, thank goodness. Test everything twice.
AdSense Tip: A glitch-free store keeps visitors engaged, boosting your chances of Google AdSense approval.
Step 9: Boost Your SEO (Get Found on Google)
Want your store to pop up when someone searches “buy handmade ceramic mugs”? That’s where Shopify SEO comes in. Good SEO drives free traffic, which pairs perfectly with Google AdSense revenue. Here’s how I got my store ranking:
- Find Keywords: Use SEMrush to uncover terms like “eco-friendly mugs for sale.” Focus on specific phrases with low competition.
- Optimize Products: Add keywords to titles, descriptions, and image alt text. For example, “Handmade Ceramic Mug for Coffee Lovers” as a title.
- Start a Blog: Under “Online Store” > “Blog Posts,” write articles like “5 Tips for Choosing Eco-Friendly Mugs.” Blogs boost SEO and keep visitors on your site.
- Speed It Up: Compress images with TinyIMG—Google loves fast sites.
- Link Pages: Link your blog posts to product pages to guide visitors to shop.
My Journey: SEO felt like wizardry at first, but once I started blogging about plant care tips, my traffic doubled. Be patient—it pays off.
AdSense Tip: High-quality, keyword-rich content (at least 20-30 unique pages) signals to Google AdSense that your store is valuable and ad-ready.
Skyrocket Your SEO with SEMrush →
Step 10: Launch Your Store (The Big Moment!)
You’re so close! Launching your Shopify store is like opening the doors to your dream shop. Here’s how to make it official:
- Pick a Plan: In “Settings” > “Plan,” choose the Basic plan ($29/month) to start. You can upgrade later as sales grow.
- Go Live: In “Online Store” > “Preferences,” uncheck “Enable password” to make your store public.
- Final Check: Ensure products, prices, and checkout work perfectly. Test one last time.
- Hit launch and celebrate!
My Launch Story: I was so nervous to launch, I checked everything 10 times. Then I shared it on Instagram with a 10% off code, and my first sale came within hours. Share your launch with friends or social media—it’s a big deal!
AdSense Tip: A live, active store with regular updates (new products, blog posts) shows Google AdSense you’re serious, increasing approval odds.
Launch Your Shopify Store Now →
Step 11: Drive Traffic to Your Store (Turn Visitors into Fans)
Your store’s live—now let’s get people through the door! Traffic is the lifeblood of your Shopify store, and these strategies will help you shine:
- Social Media: Post on Instagram or TikTok showing your products in action. I got tons of clicks from a reel about my mugs’ unique designs.
- Email Marketing: Use Klaviyo to send welcome emails or “you left something in your cart” reminders.
- Ads: Try Google Shopping Ads or Pinterest ads for targeted reach. Start small with $5/day to test.
- Influencers: Team up with small influencers via Shopify Collabs. A local blogger boosted my sales early on.
- Blogging: Write posts like “Why Ceramic Mugs Are the Best Gift for Coffee Lovers” to pull in search traffic.
My Hack: Pinterest was a game-changer for me. I pinned product images with keywords, and traffic poured in. Start with one platform and grow from there.
AdSense Tip: More traffic from diverse sources (social, search, email) makes your store a prime candidate for Google AdSense, as it shows engagement.
Build Your Email List with Klaviyo →
Step 12: Track and Grow (Make Your Store a Success)
Your store’s up and running, but the real magic happens when you track what’s working and tweak what’s not. Here’s how I keep my store growing:
- Shopify Analytics: Check your dashboard for top products and traffic sources. My best-seller? A blue ceramic mug I almost didn’t list!
- Google Analytics: Add it to track where visitors come from. It’s free and helps you focus on what works.
- Customer Reviews: Use Yotpo to collect feedback. Reviews build trust and boost sales.
- Test and Tweak: Try new product photos or headlines to see what gets more clicks.
My Advice: Don’t stress about slow days. My first month was quiet, but consistent blogging and social posts turned things around. Keep going!
AdSense Tip: Regular updates (new products, blog posts) and high engagement signal to Google AdSense that your store’s a great fit for ads.
Keep Growing Your Shopify Empire (The Sky’s the Limit)
You did it—you launched a Shopify store! That’s huge. But this is just the start. Here’s how to take it to the next level:
- Go Offline: Got a physical shop? Use Shopify POS to sync online and in-person sales.
- Learn More: Shopify’s free courses cover everything from marketing to scaling.
- Add Apps: Check the Shopify App Store for tools to supercharge your store.
- Stay You: Keep your store authentic. Customers love real humans, not cookie-cutter brands.
My Final Thought: Building my store was scary, messy, and so worth it. Every sale, every happy customer email, reminds me why I started. Your store can be your legacy—go make it amazing.
Start Your Shopify Journey Today →
Affiliate Disclaimer: Keeping It Real with You
Alright, let’s have a quick heart-to-heart. This guide has affiliate links, meaning if you click one and buy something, I might earn a small commission at no extra cost to you. It’s how I keep the lights on, pay for hosting, and share free guides like this one.
I only recommend stuff I’ve used or trust, like Shopify, Namecheap, or Klaviyo. I’d never push something just for a buck—it’s not my style. Here’s who I’m partnered with:
- Shopify Affiliate Program
- Namecheap Affiliate Program
- SEMrush Affiliate Program
- Klaviyo Affiliate Program
- Tailor Brands Affiliate Program
- Yotpo Affiliate Program
Thanks for supporting my little corner of the internet—it means more than you know!


Leave a Reply